Sunday, November 15, 2020

Carolina Honey Ribs


Remember the restaurant Tony Romas? They had some delicious ribs called 'Carolina Honeys.' My mom gave me this recipe probably about 20 years ago. I hadn't made the recipe in years! Why? I just forgot about it. I make ribs fairly often but I always make a BBQ sauce with a ketchup base. 

Why had a forgotten about this recipe????? My family and I have missed out for years!!

Seriously....this is an amazing recipe.  Try it!

Carolina Honey Ribs

2-3 lbs Pork Ribs (I like the St. Louis style rib because they are meaty!)

Sauce

1 1/2 C. Maple syrup

2 TBLS. Chili sauce

2 TBLS. Apple cider vinegar

2 TBLS. Onion- finely diced

2 cloves pressed garlic

1 TBLS. Worcestershire 

1 TBLS. Spicy brown mustard

1/2 tsp. Pepper

1/2 tsp. Liquid smoke (I used hickory but mesquite would probably be fine too)

Mix the sauce ingredients together. I used a Slow cooker. I just put the ribs in standing them up with the bone against the pot, cover with the sauce and cook on low for 7-8 hours. Drain the fat off and use the drippings as a gravy for the ribs. The sauce is also delicious on mashed potatoes. So easy!

You could also put them in an oven at 325° for 6 hours. But the Slow cooker is just so easy especially if you put a Slow cooker liner in first. Super easy clean up!


Tuesday, October 13, 2020

Hungarian Mushroom Soup


I came across this Hungarian Mushroom Soup recently and as I looked over the recipe it seemed it might be really good! It was!! It was full of flavor! If you love mushrooms like I do, this is a must try! This recipe only makes enough for about 4 bowls so if you are feeding a family I would double the recipe.

Ingredients:
4 TBLS. Salted butter
16 oz. Cleaned, dried and sliced crimini mushrooms (you could use button but crimini has more flavor)
1 1/2 C. Chopped white onion
2 tsp. Dried dill weed
1 tsp. Thyme
1 TBLS. Paprika
2 cloves fresh garlic grated or minced
2 1/2 C. Chicken Stock
2 TBLS. Soy sauce
1 TBLS. Lemon juice
1 C. Half and half or whole milk
3 TBLS. Flour

In a dutch oven or soup pot, saute the onions and mushrooms in the butter over medium heat for 5 minutes. Then, season with dill, thyme, and paprika and allow the mushrooms and onions to continue cooking for an additional 7-10 minutes, stirring often. Sprinkle the grated garlic over the mushrooms 30 seconds before the mushrooms are done. (Garlic burns easily)
Slowly pour in the chicken stock, soy sauce, and lemon juice and scrape the bottom of the pot to loosen anything that might be stuck on. Allow the soup to gain a simmer and then let cook and reduce for 5 minutes. While the soup is reducing, whisk together the milk and flour in a small bowl until smooth Pour the mixture while whisking into the soup and continue to cook the soup for 8-10 minutes, or until the soup thickens, stirring as required.
Garnish with parsley and creme fraiche (or sour cream)


*little spice jar Pinterest


Thursday, January 23, 2020

Creamy Crack Chicken Soup

Made a new soup for dinner tonight. You know those nights when you don't know what to make and you check out Pinterest for some ideas? That was me tonight. I came across this recipe and I had all the ingredients so I decided to give it a go.
I am so glad I did! I will definitely be adding this to my soup repertoire. Delicious! 
https://pin.it/cohqtrk5elg6sf

Ingredients
  • 4 slices bacon, diced
  • 1 tablespoon butter
  • 1 small yellow onion, diced
  • 3 cloves garlic, minced
  • 4 to 6 cups low sodium chicken broth
  • 1/2 teaspoon garlic powder
  • 1/2 teaspoon onion powder
  • 1/2 teaspoon dried dill weed
  • 1/2 teaspoon dried chives
  • salt and fresh ground pepper, to taste
  • 1 bay leaf
  • 4 cups cooked shredded chicken
  • 1 package (8 ounces) softened cream cheese
  • 1 cup shredded cheddar cheese
  • 3 to 4 cups baby spinach
  • 1/4 cup heavy cream
  • sliced green scallions, for garnish
  • Instructions
    1. Cook diced bacon to a crisp in a Dutch Oven or soup pot.
    2. Remove bacon from pot with a slotted spoon, leaving bacon grease in the pot.
    3. Add butter to the pot and melt over medium-high heat.
    4. Stir in onions and cook for 3 minutes.
    5. Stir in garlic and cook for 20 seconds.
    6. Add chicken broth and scrape up all the browned bits from the bottom of the pot.
    7. Season with garlic powder, onion powder, dill weed, chives, salt, and pepper.
    8. Add bay leaf and bring to a boil; lower heat to medium low and cook for 5 minutes.
    9. Stir in shredded chicken; cook for 5 minutes.
    10. Add cream cheese and whisk in until completely melted and combined.
    11. Stir in shredded cheese; whisk until melted and thoroughly combined.
    12. Add baby spinach; cook for 2 minutes.
    13. Stir in heavy cream and cook for 1 minute.
    14. Taste for seasonings (salt and pepper) and adjust accordingly. Remove bay leaf.
    15. Remove soup from heat; top with scallions and previously prepared bacon

Tuesday, August 1, 2017

Ham and Swiss Sliders


You have to try these!! That is all.
http://www.gracefullittlehoneybee.com/ham-swiss-sliders/

1 package Hawaiian Sweet Rolls (12 count)

18 slices of thin deli ham

12 slices Swiss cheese

1 stick butter

1 tbsp yellow mustard

1/2 tbsp Worcestershire Sauce

1/2 tbsp dried minced onion (I used onion powder)

1/4 tsp salt

1/4 tsp pepper

Parmesan cheese (I used about 1/4 shredded and sprinkled on top of rolls) 

dried parsley 

Step 1: Preheat oven to 350. Cover 9×13 baking pan with foil. Spray with cooking spray.
Step 2: Remove rolls from package in one piece.

Step 3: Cut entire slab of rolls in half lengthwise. (You will end up with one slab of “tops” and one slab of “bottoms”.)

Step 4: Place bottom slab in foiled cover pan.

Step 5: Layer with half of the ham , then the Swiss cheese, then the rest of the ham.

Step 6: Add top slab of rolls.

Step 7: Melt butter in microwave and whisk in remaining ingredients (except parm. cheese and parsley). Pour evenly over rolls. Sprinkle with Parmesan and parsley. (The original recipe says to do that at the end. I liked it adding a little crispiness to the outside of the roll so I did it before I baked them.)

Step 8: Cover with foil and let sit for 5-10 minutes.

Step 9: Bake covered for 20 minutes.

Step 10: Uncover and cook 5 additional minutes.

Step 11: Slice into individual sliders and serve warm.


Friday, July 28, 2017

Philly Cheese Steak Sloppy Joes

We tried a new recipe last night for dinner. The meat was sooo good!! It was great on the Brioche Bun, but we were thinking it would be good on a tortilla too (or any bread). The meat was good alone and didn't even need the bread if one is trying to keep carbs low.
This recipe is a keeper!
As I was typing this, Jake walked in from work and he and Inna are heating it up for a late lunch! Yep, yum!
http://dinnerthendessert.com/philly-cheese-steak-sloppy-joes/

  • 1 pound lean ground beef
  • 2 tablespoons butter
  • 1 small yellow onion, diced
  • 1 small green bell pepper, diced
  • 8 ounces brown mushrooms minced
  • 2 tablespoons ketchup
  • 1 tablespoon Worcestershire sauce
  • 1/2 teaspoon Kosher salt
  • 1/2 teaspoon fresh ground black pepper
  • 1 tablespoon cornstarch
  • 1 cup beef broth
  • 8 ounces Provolone Cheese Slices, chopped (use 6oz if you don’t want it very cheesy)
  • 6 brioche hamburger buns
  • Directions:
  • Add the ground beef to a large cast iron skillet (this browns very well) and brown until a deep brown crust appears before breaking the beef apart. (I just did it in a regular frying pan)
  • Stir the ground beef and brown until a deep crust appears on about 50 or so percent of the beef.
  • Remove the beef (you can leave the fat) and add the butter and the onions and bell peppers and mushrooms.
  • Let brown for 1-2 minutes before stirring, then let brown for another 1-2 minutes before stirring again.
  • Add the beef back into the pan.
  • In a small cup mix the beef broth and cornstarch together
  • Add the ketchup, Worcestershire sauce, salt, black pepper, beef broth/cornstarch mixture into the pan.
  • Cook until the mixture is only slightly liquidy (about 75% of the mixture is above liquid), 3-5 minutes.
  • Turn off the heat, add in the provolone cheese.
  • Served on toasted brioche buns.

Monday, May 8, 2017

Sugar Cream Pie


I found this recipe on Pinterest a few weeks ago. It looked so delicious that I decided to give it a try this weekend.

Do any of you remember TV dinners way back in the day? Every once in awhile my parents would throw in the oven tv dinners for us kids when they went out on a date. The vanilla custard was always my favorite part! I haven't found anything that tastes like it since that time.
Well, now I have! This pie has a very similar taste and texture to that yummy vanilla custard in those TV dinners. It is sweet, but not super sweet. It is rich and delicious! I only put about 2 TBLS cinnamon sugar on top because I wanted to taste more of the vanilla custard and sometimes cinnamon can overpower some flavors. We really liked just the hint of cinnamon on top, but you can adjust for your preference!


Sugar Cream Pie

Author: Hayley Parker, The Domestic Rebel
Prep time: 
Cook time: 
Total time: 
Serves: 8

Ingredients
  • 1 DEEP DISH pie crust, at room temperature (I used a frozen one, but you can use refrigerated pie crusts too)
  • 4 Tbsp cornstarch
  • 3/4 cup white sugar
  • 4 Tbsp butter, melted
  • 2 & 1/4 cups heavy cream
  • 1 Tbsp vanilla
  • FOR TOPPING:
  • 4 Tbsp butter, melted
  • 1/4 – 1/2 cup cinnamon sugar (1/4 or 1/2 cup sugar with 2-3 teaspoons ground cinnamon mixed in. Start with 1/4 cup, but add up to 1/2 cup if you prefer things sweet).
Instructions
  1. Preheat oven to 325 degrees F. Place the pie crust onto a baking sheet. Or, if using a refrigerated crust, lightly grease a 9″ pie pan, put the crust in, and set the pan on a baking sheet. Bake for approximately 10-12 minutes or until partially baked. Set aside.
  2. In a small bowl, mix together the cornstarch and sugar until blended. In a medium saucepan, bring the cornstarch-sugar mixture, melted butter and heavy cream together over medium heat, stirring constantly. The mixture is done when it’s thick and creamy. Stir in the vanilla.
  3. Pour the mixture into the prepared pie crust and smooth out the top. Drizzle on the melted butter and evenly sprinkle on the cinnamon sugar. Bake for approx. 25 minutes, then turn on the broiler and broil for about 1 minute, watching carefully. Remove from oven and allow to come to room temperature before refrigerating for at least one hour to set. Store in fridge.

Sunday, February 28, 2016

Island Pork Tenderloin


 I love to make Pork Tenderloin...especially when we are trying to eat healthier!! I had one of my recipes in mind, but I didn't have one of the most important ingredients...So I went to Pinterest to find some Pork Tenderloin recipes. I am so glad I did!! This is "Island Pork Tenderloin" 
It was so easy and an absolute HIT!! The sauce was so delicious and it would be good on chicken too. I didn't have any Tabasco so I used Frank's Hot Sauce. I also ended up cooking mine for 25 minutes, then under the foil for another 15.

This is going to be a part of our regular repertoire when Pork Tenderloin is on the menu!!


For spice rub:
  • 2 tsp salt
  • ½ tsp pepper
  • 1 tsp cumin
  • 1 tsp chili powder
  • 1 tsp cinnamon
  • 2 pork tenderloins (2 ¼ - 2 ½ lbs total) trimmed
  • 2 tbsp olive oil

For Glaze:
  • ¾ cup packed dark brown sugar
  • 2 tbsp finely chopped garlic
  • 1 tbsp Tabasco

Stir the spice rub ingredients together in a small bowl and rub all over the pork.  Heat oil in ovenproof 12-inch heavy skillet over medium high heat.  Brown pork, turning occasionally, about 4-5 minutes total.  Remove from heat, but leave pork in skillet.

Stir together brown sugar, garlic and Tabasco in a small bowl.  Pat the mixture on top of the pork.  Place skillet in the oven at 350.  Roast until thermometer inserted diagonally into the center of each tenderloin registers 140 degrees, about 20 minutes.  Let pork stand in skillet, loosely covered with foil for 10 minutes. 


(http://fattaincassa.blogspot.cz/2014/11/island-pork-tenderloin.html).

Tuesday, January 26, 2016

Chicken Tamale Pie


  • So we are back to eating less caloric meals... because that is what we do every January. :) This is another Pinterest meal. I love Pinterest! I find such great recipes there. Anyway, this delicious meal only comes to about 220 calories per serving (serves about 8). One of the great things about this dinner is that your house will smell heavenly! We couldn't wait to dig in. Yes, it was a hit! 


  • Ingredients:

  • ⅓ cup fat free milk
  • ¼ cup egg substitute
  • 1½ tablespoon taco seasoning, divided
  • ¼ teaspoon ground red pepper
  • 1 (14¾ ounce) can cream-style corn
  • 1 (8.5 ounce) box corn muffin mix (such as Jiffy)
  • 1 (4 ounce) can chopped green chiles, drained
  • 1 (10 ounce) can red enchilada sauce 
  • 2 cups shredded cooked chicken breast (I just used a can of chicken...so much easier!!)
  • 2/3 cup shredded Mozzarella cheese 

Directions:

  1. Preheat oven to 400°.
  2. Combine the first 7 ingredients (milk through green chiles), using just ½ tablespoon of the taco seasoning, in a large bowl, stirring just until moist. Pour mixture into a round pie plate coated with cooking spray.
  3. Bake at 400° for 20-30 minutes. While corn is baking, toss the chicken in the remaining 1 tablespoon taco seasoning. When corn is done - it will be just barely set and golden brown - pierce entire surface liberally with a fork (it might stick a little bit to the fork). Pour enchilada sauce over top. Top with chicken; sprinkle with cheese. Bake at 400° for 15 minutes or until cheese melts. Remove from oven; let stand 5 minutes. 

Recipe from: pinchofyum.com

Tuesday, September 29, 2015

Easy Stovetop Macaroni and Cheese

A friend of mine had posted this recipe on Facebook. It looked really good and pretty simple. I have to admit, I'm not a big Mac and Cheese fan...I never have been, even as a child....however, Ryan and my husband are. If we have Mac and Cheese, which is pretty rare, I just pull it out of the box and whip it up. I then make something different for myself...because, yeah, not a big fan.

The picture that was posted with the recipe just looked so good. So, what was the consensus? I still don't like boxed Mac and Cheese, but I really, really like THIS Mac and Cheese! Of course it is more work and expense than the boxed kind, but it is soooo much better. It doesn't actually taste anything like boxed Mac and Cheese.

This was a thumbs up from the entire family! It made quite a lot too...which is great since we had leftovers for lunch for several days.

My family thinks that rating from 1-10 is really difficult...so I think I will do thumbs up or down, but I need to think of something to do if it's in the middle range. Hmmm.....

Ingredients:
1 pound uncooked pasta shells

4 cups whole milk

8 Tablespoons (1 stick) unsalted butter

1/2 cup all-purpose flour

1/4 teaspoon dry mustard (optional)

3 cups shredded sharp cheddar cheese

1 cup shredded Parmesan cheese
Directions:
Bring a large pot of salted water to a boil. Add the pasta and cook it just until al dente, about 11 minutes. Drain the pasta then set it aside.
In a medium saucepan set over medium heat, warm the milk until it is simmering then set it aside.
In a large heavy-bottomed stock pot, melt the butter over medium heat. Once the butter has melted, whisk in the flour and cook the mixture, whisking constantly, until it turns light brown in color and has a slightly toasted aroma, about 3 minutes. Whisk in the dry mustard (optional).
Remove the pot from the heat then slowly whisk the warm milk into the flour mixture. Continue whisking constantly to avoid any lumps. (The mixture will become very thick and then thin out gradually until it is smooth.)
Return the pot to the stove over medium-high heat and cook the mixture while whisking constantly until it has thickened enough to coat the back of a spoon, about 2 minutes. Season the mixture with salt and pepper and reduce the heat to medium. Stir in the cheddar and Parmesan cheeses until they are melted and the cheese sauce is smooth. Add the pasta, stirring to combine, and cook just until the pasta is warmed throughout. Serve immediately.
You can add chicken, ham, vegetables or anything else to this to suit you!!
Recipe from: Justataste.com


Tuesday, September 22, 2015

Fall-Off-The-Bone Slow Cooker Ribs

I found this recipe on Pinterest a few months ago and since I rarely make ribs, and have never done so in a crockpot, I decided to try this recipe. My afternoons are busy so anything I can make ahead is a total bonus for me. It is so great to be able to throw something in the crockpot in the morning and pull it out in time for dinner. This would have been great back when the boys were playing football to have had ready when they came home late in the evening famished!

So the consensus was....DELICIOUS!!!!!!!!!!!!! Texas Roadhouse has nothing on these babies!! It was also one of the easiest meals I have made in awhile. The ribs were fall apart tender!!!! Plus, it made everyone in the family happy as our chocolate lab, Mamie, enjoyed the bones. :)

Directions:

Place a slab (you can cut it in half or thirds if it won't fit in your pan) of Baby Back or St. Louis Style Pork Loin Ribs (I'm sure beef ribs or any other ribs would be just fine too) in a baking dish and put them into a pre-heated 425* oven and bake for 20 minutes (this is the trick to making these ribs great and it gets some of the fat off). After you remove it from the oven, let the ribs sit for about 10 minutes to cool down to about room temperature. Season well with your favorite rub...I just used salt and pepper.

At this point I cut the slab in half to fit into the slow cooker. Just throw them in, add a little of your favorite BBQ sauce (not the whole bottle, just enough that the ribs have some sauce on them), cover and cook on low for 6 hours.....and....wah-lah.. out come beautiful, fall-off-the-bone ribs! Warm up some of the BBQ sauce to serve on the side. YUM!!!! How easy is that? Our favorite BBQ sauce is Sweet Baby Ray's Honey Barbecue Sauce.


This recipe came from Renee's Kitchen Adventures


Monday, September 14, 2015

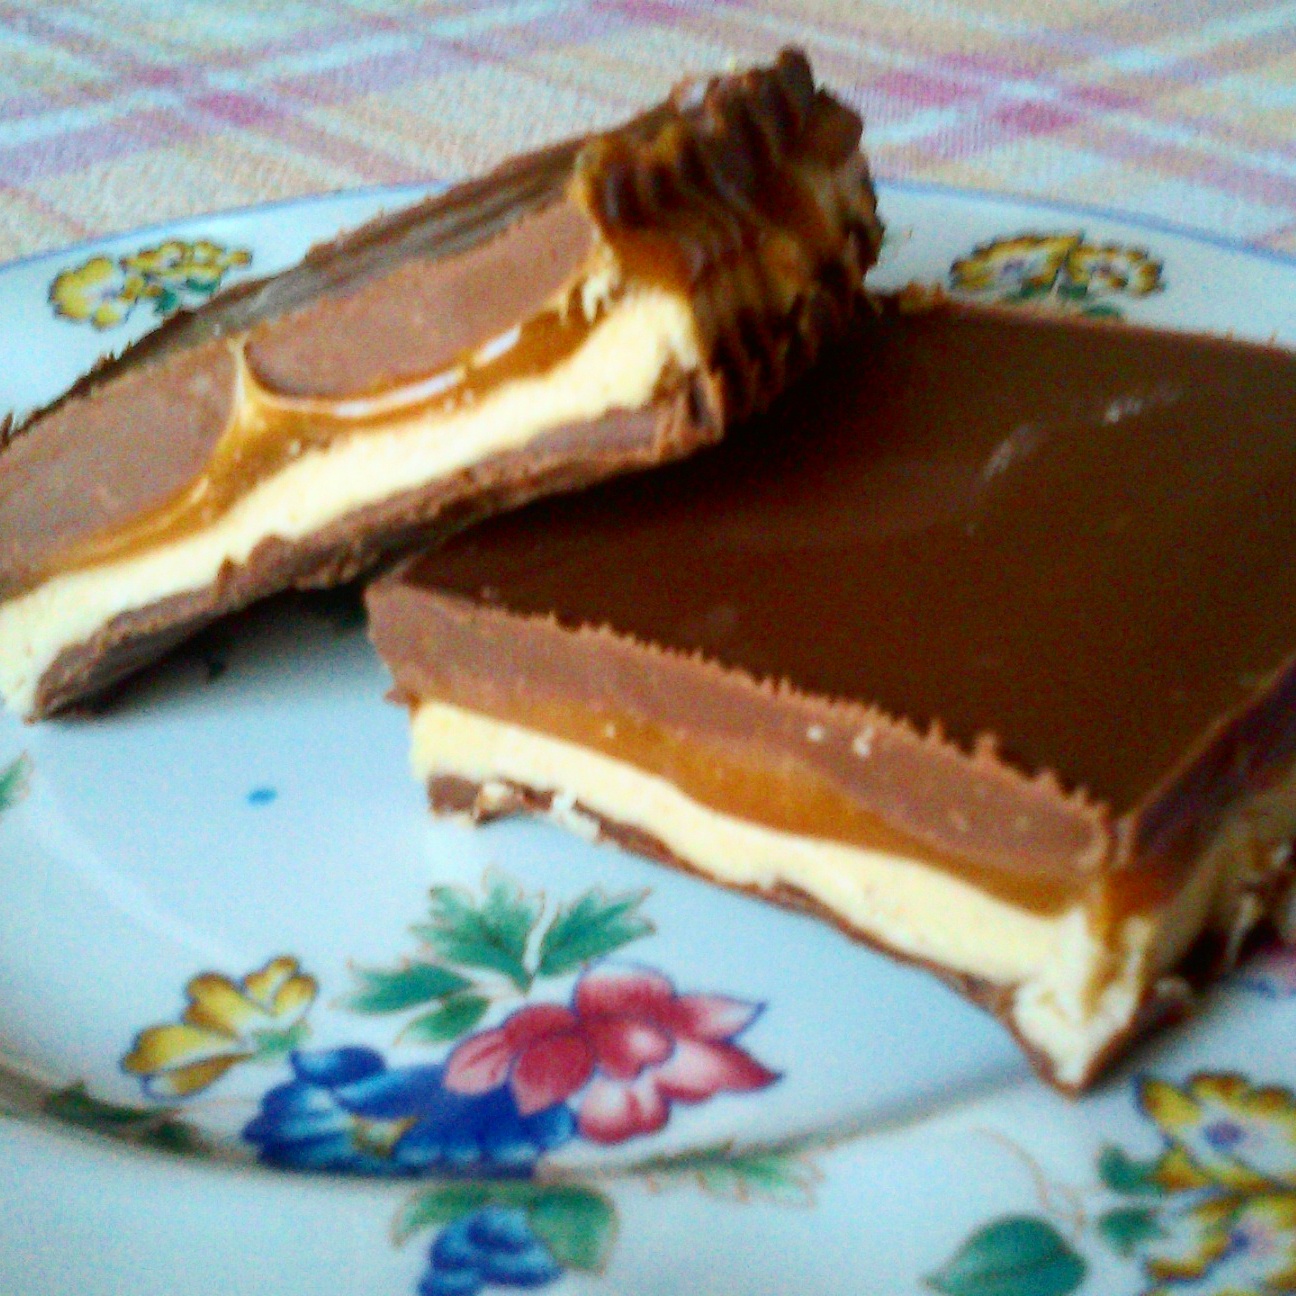
Billion Dollar Candy Bar


Two years ago, going around on Facebook was a delicious looking dessert recipe called "Billion Dollar Candy Bar." I posted it to my wall to try at some point and then totally forgot about it. While browsing my past posts on Facebook, I came across this recipe I had saved to my wall. I just had to try it!! Ummm, yeah, these are really good!! They are super rich so I would suggest cutting them into bite sized pieces. They are a layered candy, so they take a little time to make, but the recipe was really simple. I didn't take everyone's individual ratings...you can just look at these and see they are super delicious!!!!

Bottom  Chocolate Layer
1 cup milk chocolate chips (or half semi-sweet)
1/3 cup butterscotch chips
1/3 cup peanut butter
Melt milk chocolate chips, butterscotch chips and peanut butter in a pan over low heat; stirring constantly. Pour mixture into a 9 x 13″ baking pan lightly coated with nonstick spray or lined with plastic wrap which is long enough to drape over sides of the pan. Spread mixture and place in the refrigerator for 30 minutes.

Nougat Layer
4 tablespoons butter
3/4 cup sugar
1/4 cup light brown sugar
1/4 cup evaporated milk
1-1/2 cups marshmallow creme
1/3 cup peanut butter
1-1/2 cups chopped salted peanuts (optional)
Melt butter over medium heat in pan; add sugars and evaporated milk; bring to a boil, and cook additional 5 minutes while stirring. Remove from the heat and add marshmallow creme and peanut butter. Pour over the bottom layer and gently spread mixture. If you use peanuts, scatter across the top. Place in the refrigerator for 15 - 30 minutes.

Caramel Layer
1 (14-ounce package) caramel candy
1/4 cup cream
1 tablespoon butter
Place the unwrapped caramel candy, butter, and cream in a medium saucepan. Place over low heat and stir until the mixture has completely melted and is smooth. Pour in the pan and quickly spread over nougat layer.  Place in the refrigerator for 15 - 30 minutes.

Top Chocolate Layer
1 cup milk chocolate chips (or half semi-sweet)
1/3 cup butterscotch chips
1/3 cup creamy peanut butter
Melt milk chocolate chips, butterscotch chips, and peanut butter in a pan over low heat, stirring consistently. Pour over the caramel layer and spread. Place in the refrigerator for at least 1 hour before cutting into squares. Store in an air-tight container.

http://www.twirlandtaste.com/2012/12/take-bite-of-candy-mans-billion-dollar.html

Tuesday, September 8, 2015

Broccoli and Cheese Soup


Since Sunday was the first cooler day we have had in awhile, I decided to make soup for dinner.
I had my eye on this Broccoli and Cheese Soup I found on Pinterest (peasandcrayons.com) 
and decided to give it a go.
It was really thick...and I told the family I wouldn't make it so dense next time, but they said they liked how thick it was. It was so good and very filling.  We had French Bread with the soup and it was a perfect cool, evening dinner. Definitely a keeper!! If you are feeding more than 3 people, I would suggest doubling the recipe. The three of us each got a bowl, but that was it.

Ben: 10
Becky: 9
Ryan: 8

BROCCOLI AND CHEESE SOUP
PREP TIME
COOK TIME
TOTAL TIME
Author: 
Recipe type: Entree
Cuisine: American
Serves: 2 big bowls
INGREDIENTS
  • one bunch of fresh broccoli [enough for a few cups of chopped tops]
  • 2 cups vegetable [or chicken!] broth
  • ½ cup of sharp cheddar cheese, plus extra for topping [freshly grated]
  • 1 heaping cup of regular gouda cheese [freshly grated]
  • 1 cup of shredded carrots [or a little extra!]
  • 1 small white onion [about ⅔ cup or 1 cup, chopped]
  • 2 large cloves of garlic, minced
  • 1 cup half and half [or heavy cream], room temperature
  • 3 TBSP all purpose flour
  • 3 TBSP butter
  • 1 bay leaf
  • ¼ tsp garlic powder
  • ⅛ tsp allspice
  • ⅛ tsp ground nutmeg
  • ⅛ tsp dried basil
  • ⅛ tsp cayenne pepper
  • ⅛ tsp salt [will vary based on salt content of your stock/broth]
  • a few cranks of freshly ground black pepper, to taste
INSTRUCTIONS
  1. First chop veggies: Chop em! Dice the onions super small, mince the garlic, an shred the carrots if you didn't buy pre-shredded. This can all be done ahead of time and stored in the fridge for later. For the broccoli, chop ⅔ of it into tiny florets [just cut off as much stem as you can and it'll fall apart in the pot] and then take the remaining ⅓ and give it a rough chop so you have a few large pieces to add to the soup. Totally optional!
  2. Add your veggie broth to a pot on medium-high heat, add your ⅔ of your broccoli [about 2 cups of florets] as well as your onion, garlic, carrots, and bay leaf. Simmer on medium, covered, for about 15-20 minutes or until the veggies are tender.
  3. Once the broth is done, start your roux: In a large pot, melt 3 tablespoons of butter on medium heat, whisking constantly. Once melted, slowly add 3 tablespoons of flour as you continue to whisk.
  4. For a thicker soup, use an extra tablespoon of each. I skipped it. Remove from heat and slowly pour in the broth from your veggie mixture [its okay if some of the veggies jump in along side it!] and stir to incorporate.
  5. Next pour in the veggies and slowly stir in 1 cup of room temperature half and half.
  6. Return to the burner on very low heat, uncovered.
  7. Spoon out the bay leaf and season with the above herbs and spices, adding a little extra of whichever you like to taste. I personally adore the pinch of nutmeg in this soup but feel free to leave it out if it's just not your cup of tea! The soup is great both ways! Depending on the saltiness of your broth, you might skip the salt entirely or prefer to add a bit more. Taste and tweak as needed after adding your cheese.
  8. Oh yes: the cheese! Once the soup has warmed back up, stir in the grated cheeses [slowly and in small batches] and remove from heat immediately. I won't tell if you sneak extra cheese in your soup =)
  9. That extra broccoli you left on the side? Blanch in boiling water, steam in your microwave, or basically cook it however you'd like, then stir that green goodness into your completed soup for great texture and an extra burst of broccoli.
  10. Garnish with a little extra grated cheddar and a sprinkle of parsley and even a pinch of spicy red pepper flakes if you'd like! Anything goes!
Feeling fancy? garnish with red pepper flakes, parsley, and extra sharp cheddar