Tuesday, September 22, 2015

Fall-Off-The-Bone Slow Cooker Ribs

I found this recipe on Pinterest a few months ago and since I rarely make ribs, and have never done so in a crockpot, I decided to try this recipe. My afternoons are busy so anything I can make ahead is a total bonus for me. It is so great to be able to throw something in the crockpot in the morning and pull it out in time for dinner. This would have been great back when the boys were playing football to have had ready when they came home late in the evening famished!

So the consensus was....DELICIOUS!!!!!!!!!!!!! Texas Roadhouse has nothing on these babies!! It was also one of the easiest meals I have made in awhile. The ribs were fall apart tender!!!! Plus, it made everyone in the family happy as our chocolate lab, Mamie, enjoyed the bones. :)

Directions:

Place a slab (you can cut it in half or thirds if it won't fit in your pan) of Baby Back or St. Louis Style Pork Loin Ribs (I'm sure beef ribs or any other ribs would be just fine too) in a baking dish and put them into a pre-heated 425* oven and bake for 20 minutes (this is the trick to making these ribs great and it gets some of the fat off). After you remove it from the oven, let the ribs sit for about 10 minutes to cool down to about room temperature. Season well with your favorite rub...I just used salt and pepper.

At this point I cut the slab in half to fit into the slow cooker. Just throw them in, add a little of your favorite BBQ sauce (not the whole bottle, just enough that the ribs have some sauce on them), cover and cook on low for 6 hours.....and....wah-lah.. out come beautiful, fall-off-the-bone ribs! Warm up some of the BBQ sauce to serve on the side. YUM!!!! How easy is that? Our favorite BBQ sauce is Sweet Baby Ray's Honey Barbecue Sauce.


This recipe came from Renee's Kitchen Adventures


Monday, September 14, 2015

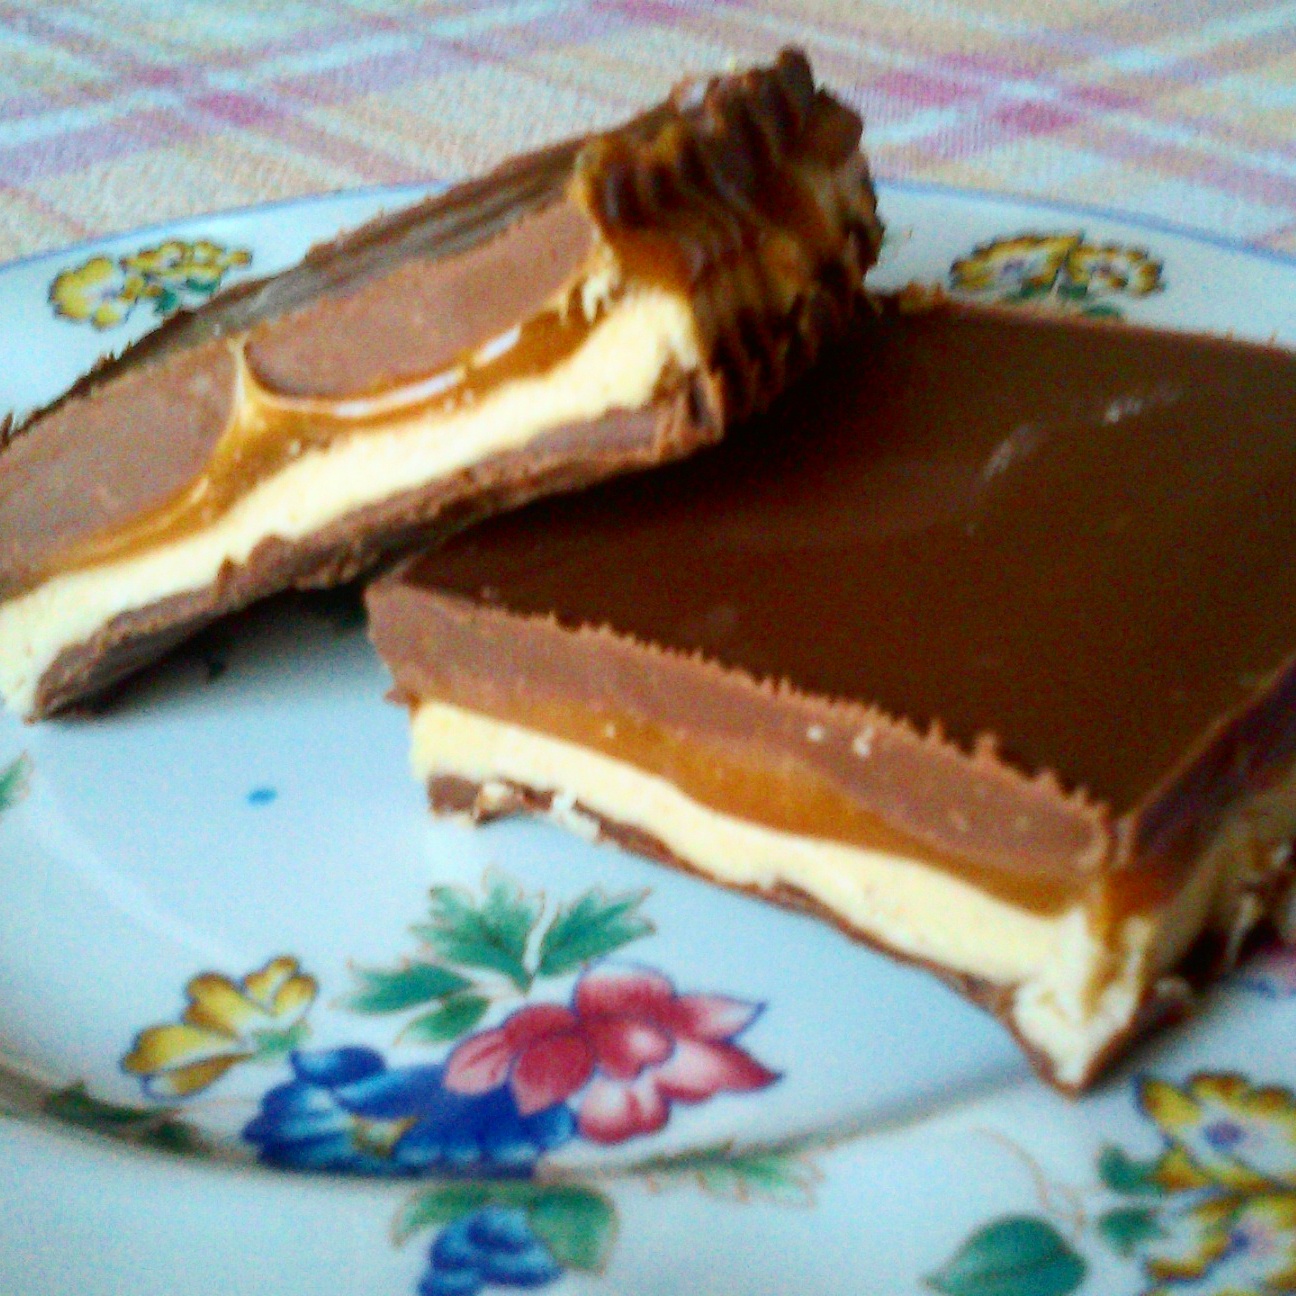
Billion Dollar Candy Bar


Two years ago, going around on Facebook was a delicious looking dessert recipe called "Billion Dollar Candy Bar." I posted it to my wall to try at some point and then totally forgot about it. While browsing my past posts on Facebook, I came across this recipe I had saved to my wall. I just had to try it!! Ummm, yeah, these are really good!! They are super rich so I would suggest cutting them into bite sized pieces. They are a layered candy, so they take a little time to make, but the recipe was really simple. I didn't take everyone's individual ratings...you can just look at these and see they are super delicious!!!!

Bottom  Chocolate Layer
1 cup milk chocolate chips (or half semi-sweet)
1/3 cup butterscotch chips
1/3 cup peanut butter
Melt milk chocolate chips, butterscotch chips and peanut butter in a pan over low heat; stirring constantly. Pour mixture into a 9 x 13″ baking pan lightly coated with nonstick spray or lined with plastic wrap which is long enough to drape over sides of the pan. Spread mixture and place in the refrigerator for 30 minutes.

Nougat Layer
4 tablespoons butter
3/4 cup sugar
1/4 cup light brown sugar
1/4 cup evaporated milk
1-1/2 cups marshmallow creme
1/3 cup peanut butter
1-1/2 cups chopped salted peanuts (optional)
Melt butter over medium heat in pan; add sugars and evaporated milk; bring to a boil, and cook additional 5 minutes while stirring. Remove from the heat and add marshmallow creme and peanut butter. Pour over the bottom layer and gently spread mixture. If you use peanuts, scatter across the top. Place in the refrigerator for 15 - 30 minutes.

Caramel Layer
1 (14-ounce package) caramel candy
1/4 cup cream
1 tablespoon butter
Place the unwrapped caramel candy, butter, and cream in a medium saucepan. Place over low heat and stir until the mixture has completely melted and is smooth. Pour in the pan and quickly spread over nougat layer.  Place in the refrigerator for 15 - 30 minutes.

Top Chocolate Layer
1 cup milk chocolate chips (or half semi-sweet)
1/3 cup butterscotch chips
1/3 cup creamy peanut butter
Melt milk chocolate chips, butterscotch chips, and peanut butter in a pan over low heat, stirring consistently. Pour over the caramel layer and spread. Place in the refrigerator for at least 1 hour before cutting into squares. Store in an air-tight container.

http://www.twirlandtaste.com/2012/12/take-bite-of-candy-mans-billion-dollar.html

Tuesday, September 8, 2015

Broccoli and Cheese Soup


Since Sunday was the first cooler day we have had in awhile, I decided to make soup for dinner.
I had my eye on this Broccoli and Cheese Soup I found on Pinterest (peasandcrayons.com) 
and decided to give it a go.
It was really thick...and I told the family I wouldn't make it so dense next time, but they said they liked how thick it was. It was so good and very filling.  We had French Bread with the soup and it was a perfect cool, evening dinner. Definitely a keeper!! If you are feeding more than 3 people, I would suggest doubling the recipe. The three of us each got a bowl, but that was it.

Ben: 10
Becky: 9
Ryan: 8

BROCCOLI AND CHEESE SOUP
PREP TIME
COOK TIME
TOTAL TIME
Author: 
Recipe type: Entree
Cuisine: American
Serves: 2 big bowls
INGREDIENTS
  • one bunch of fresh broccoli [enough for a few cups of chopped tops]
  • 2 cups vegetable [or chicken!] broth
  • ½ cup of sharp cheddar cheese, plus extra for topping [freshly grated]
  • 1 heaping cup of regular gouda cheese [freshly grated]
  • 1 cup of shredded carrots [or a little extra!]
  • 1 small white onion [about ⅔ cup or 1 cup, chopped]
  • 2 large cloves of garlic, minced
  • 1 cup half and half [or heavy cream], room temperature
  • 3 TBSP all purpose flour
  • 3 TBSP butter
  • 1 bay leaf
  • ¼ tsp garlic powder
  • ⅛ tsp allspice
  • ⅛ tsp ground nutmeg
  • ⅛ tsp dried basil
  • ⅛ tsp cayenne pepper
  • ⅛ tsp salt [will vary based on salt content of your stock/broth]
  • a few cranks of freshly ground black pepper, to taste
INSTRUCTIONS
  1. First chop veggies: Chop em! Dice the onions super small, mince the garlic, an shred the carrots if you didn't buy pre-shredded. This can all be done ahead of time and stored in the fridge for later. For the broccoli, chop ⅔ of it into tiny florets [just cut off as much stem as you can and it'll fall apart in the pot] and then take the remaining ⅓ and give it a rough chop so you have a few large pieces to add to the soup. Totally optional!
  2. Add your veggie broth to a pot on medium-high heat, add your ⅔ of your broccoli [about 2 cups of florets] as well as your onion, garlic, carrots, and bay leaf. Simmer on medium, covered, for about 15-20 minutes or until the veggies are tender.
  3. Once the broth is done, start your roux: In a large pot, melt 3 tablespoons of butter on medium heat, whisking constantly. Once melted, slowly add 3 tablespoons of flour as you continue to whisk.
  4. For a thicker soup, use an extra tablespoon of each. I skipped it. Remove from heat and slowly pour in the broth from your veggie mixture [its okay if some of the veggies jump in along side it!] and stir to incorporate.
  5. Next pour in the veggies and slowly stir in 1 cup of room temperature half and half.
  6. Return to the burner on very low heat, uncovered.
  7. Spoon out the bay leaf and season with the above herbs and spices, adding a little extra of whichever you like to taste. I personally adore the pinch of nutmeg in this soup but feel free to leave it out if it's just not your cup of tea! The soup is great both ways! Depending on the saltiness of your broth, you might skip the salt entirely or prefer to add a bit more. Taste and tweak as needed after adding your cheese.
  8. Oh yes: the cheese! Once the soup has warmed back up, stir in the grated cheeses [slowly and in small batches] and remove from heat immediately. I won't tell if you sneak extra cheese in your soup =)
  9. That extra broccoli you left on the side? Blanch in boiling water, steam in your microwave, or basically cook it however you'd like, then stir that green goodness into your completed soup for great texture and an extra burst of broccoli.
  10. Garnish with a little extra grated cheddar and a sprinkle of parsley and even a pinch of spicy red pepper flakes if you'd like! Anything goes!
Feeling fancy? garnish with red pepper flakes, parsley, and extra sharp cheddar

Wednesday, August 12, 2015

Mushroom Asiago Chicken

Last night for dinner I made Mushroom Asiago Chicken. This recipe was fantastic!!! The sauce was delicious and is perfect with a linguini or spaghetti noodle. I found it on Pinterest and the link was to bakeatmidnite.com. Yum!!! ...and even the youngin'...my picky eater, thought it was amazing!

Ben: 8.5
Becky: 9
Ryan (picky boy): 8.5-9

Mushroom Asiago Chicken

1 lb. boneless skinless chicken breast
2 c. mushrooms cut in half
1 clove garlic, minced
3 sprigs fresh thyme
1 1/2 C. dry white wine
1/2 C. seasoned flour (flour with 1 tsp salt and 1/2 tsp pepper)
2 TBLS butter
2 TBLS olive oil
1/2 C heavy cream
1/4-1/2 C. shredded Asiago cheese ( I used 1/2 c because we like the stronger flavor)

Pound chicken breast with a meat mallet between 2 sheets of waxed paper or plastic wrap until meat is uniform thickness; about 1/4 inch. Cut into serving-sized pieces.

Heat the butter with 1 TBLS of the oil in deep, heavy skillet or saute pan over medium heat.

Dredge chicken in seasoned flour. Add to hot butter/oil. Saute until golden on each side and remove from pan.

Add remaining oil to hot skillet. Saute mushrooms and garlic until mushrooms begin to brown.

Add white wine to skillet, scraping up all the browned bits that are at the bottom of the pan (this is called deglazing). Bruise the fresh thyme by twisting it between your fingers or hitting it with the dull side of a knife in a few places. Add thyme to mushroom/wine in pan.

Add the chicken back to the pan. Bring to a boil, then reduce heat, cover and simmer for 15-20 minutes (I only did this for 12 minutes and it seemed good enough).

Remove chicken from pan and add the cream and heat through. Add the cheese. Cook, stirring constantly until sauce is reduced by about 1/2. Add chicken back to pan and heat through.

Serve with noodles. About 4 servings.


Tuesday, July 7, 2015

Chicken and Bacon Crescent Ring


I found this recipe on Pinterest. It is called, "Spicy Italian Crescent Ring." It looked delicious!
As I glanced at the ingredients, I knew my 16 year old son, Ryan, would not like it. Peppers, capocollo, etc.... So, I mixed it up with ingredients everyone would like. So, I will rename this recipe, "Chicken and Bacon Crescent Ring." I only used one can of Crescent Rolls since there are only 3 of us now at home. I am giving the recipe for a bigger ring that would feed about 6-8 people.

Ingredients:
2 cans Crescent Rolls
1 package oven roasted Chicken lunch meat
8 slices of cooked bacon
6-8 Slices Provolone Cheese

Sauce Ingredients:
2/3 C. Mayonnaise
2 tsp. yellow mustard
2-3tsp. honey (you can use more or less depending on how you like the sweetness)

  • Heat oven to 375* F (350*F for dark or nonstick cooking sheet)
  • Mix the Sauce Ingredients together
  • Unroll both cans of dough; separate into 8 rectangles. On ungreased 12-inch pizza pan (I did spray a little Pam on the cookie sheet), arrange rectangles in ring so short sides of rectangles form a circle in center. (Dough will overlap; half of each rectangle will hang over edge of pan. Dough ring should look like a sun).
Liberally put sauce over all of the lower half of the dough towards the middle (not the part that hangs over the edges as this will be folded over). Layer Chicken, bacon and cheese on the dough toward the center. (The picture below is of the Spice Italian Crescent Ring which you can find on the Pillsbury.com website)
  • Bring each dough rectangle hanging over side of pan up over stacked filling, tucking dough under bottom layer of dough to secure it. Repeat around sandwich until entire filling is enclosed (some filling might show a little). 
  • Bake 18-22 minutes until golden brown. Mine only took the 18 minutes, but I did a smaller version.
  • I made a little extra sauce to dip the sandwiches in...delicious!!
  • I will definitely be making this again. It was quick, easy, and everyone enjoyed it!
  • Ben: 8.5
  • Becky: 8.5-9
  • Ryan: 9


Saturday, June 27, 2015

Summer Spaghetti


We tried this recipe off of Pinterest. It looked light and refreshing. It was pretty good. I think next time I will throw in some sauteed mushrooms to give it a little more pizzazz. It heats up well the next day. I am looking forward to trying it again when I can throw in my fresh tomatoes from the garden.
This recipe is good...I wouldn't say outstanding, but definitely good.

Becky: 7.5
Ben: 7.5
Ryan wouldn't try it :)
Spaghetti in Garlic Gravy with Herbs and Lemon Marinated Chicken and Cherry Tomatoes
Ingredients:
16 oz. spaghetti pasta (cooked al dente)
1 pound chicken breast fillets (sliced into 1 inch chunks)
For the chicken marinade:
2 teaspoons fresh thyme, chopped
2 teaspoons fresh rosemary, chopped (if using dried, use half of the amount)
Zest of 1 lemon
Juice of ½ a lemon
2 Tablespoons extra virgin olive oil
1 teaspoon coarse salt (not table salt)
½ teaspoon fresh cracked black pepper
2 Tablespoons extra virgin olive oil (to sauté the marinated chicken)
-  Add all the marinade ingredients into the chicken and marinade for 20 minutes (if making this dish in pronto) or over night (if making this dish the next day… much better).
-  Saute the marinated chicken in extra virgin olive oil until cooked (about 4-5 minutes) then set aside.
For the garlic gravy:
½ stick (¼ cup) unsalted butter
2 Tablespoons extra virgin olive oil
4 large cloves garlic, finely minced
2 Tablespoons all-purpose flour
2 ½ cups chicken stock
1 Tablespoon fresh basil, chopped
salt and pepper to taste
¼ cup parsley, chopped (to sprinkle/finish the pasta)
½ cup grated parmesan cheese
2 cups whole cherry tomatoes
-  Place sauté pan over medium heat and add butter and olive oil.
-  Saute garlic until fragrant and soft.
-  Add the flour and cook for a minute.
-  Add chicken stock and simmer gravy until thickened then add the chopped basil.
-  Season with salt and pepper.
-  Add the sauteed chicken in the gravy then toss the cooked spaghetti into this sauce.
-  Add the cherry tomatoes and finish the dish with the chopped parsley and grated parmesan cheese (serve extra on the side).
Makes 5-6 servings

Tuesday, May 13, 2014

Honey Lime Chicken Enchiladas

These are my family's favorite enchiladas!  The first time we had this meal was a few years ago when the boys and I were all totally sick with the flu.  I didn't have the energy to cook, and so at night we would have a can of Campbell's soup, or one night I just warmed up some Country Crock Mashed Potatoes that we had in the refrigerator, because I didn't have the energy to do anything else.  My sister, Angie, offered to bring dinner one night.  I was so thankful to have a warm meal that had been prepared for me!!!  This is one of those times I really should have called the Relief Society President and told her I was in need...but just like most of you women, I didn't want to put anyone out (naughty me!).  These were just amazing!!!  I have made these for dinner when we have had company over, and everyone wants the recipe.  They are unique and are one of those few recipes that tastes better as it sits in the fridge and is great for lunch or dinner for the next day (if you have any leftover).

I usually make a pan of these once a week to put in a tupperware container in the fridge.  I have kids, and a husband who are constantly coming and going.  If I have some on hand, they can grab some good, homemade food as they run home from school and head to work, or other activities.  The entire family rates these enchiladas a 9.5 or a 10.

Honey Lime Chicken Enchiladas

Marinade:
1/2 C.. honey
 6 TBLS. lime juice ( 2 large limes)
 1 TBLS. chili powder
3/4  tsp. garlic powder.

1 lb. cooked shredded chicken breast (or 2 cans chicken)

16 oz. Monterey Jack and Colby Cheese  (I suppose you could use whatever you have on hand and it would be good)

Enchilada Sauce:

1 small can Green Chile Enchilada Sauce ( I prefer mild)
1/3 C. sour cream

 You cook 1 lb. chicken breast and shred it (I actually use 2 cans of chicken. It is way faster and just as good). Put the shredded chicken in the marinade and marinate it for at least half an hour.  Lightly grease a 9 x13  pan. When you are ready to assemble the enchiladas, make the enchilada sauce.  Fill flour tortillas with the chicken and about a tablespoon of cheese. Place the tortillas seam side down in pan. When the chicken is gone, keep the leftover marinade and add to it the enchilada sauce and sour cream.  Mix together and then pour all of that over the enchiladas. Sprinkle cheese on top of the sauce covered enchiladas. Bake at  350* for half an hour. ( I like to make a little extra marinade...it is really good.) This makes about 10-11 enchiladas!